Visit our Bread Recipes page for more fantastic homemade breads!
I am about to let you in on a secret. I routinely lie to my fourth born child. But I confine it to food and hope that since it’s with the end design of nourishing him that eventually I’ll be forgiven. He has such strict (and arbitrary) rules about what he will and won’t eat. He won’t touch ‘green stuff’, all vegetables with the exception of raw carrots, parsley*, cornbread or biscuits.
*I am aware that parsley falls in the ‘green stuff’ category, but I’ve tried steadfastly to pass it off as an herb -which I think we’d all agree it actually is- because herbs are acceptable to Leif. See? I told you it was arbitrary. Rosemary=good. Parlsey=gag. Can someone explain this?
Why biscuits? Dunno. Leif can’t even explain it. This is the same child who inhales cookies, bread, breadsticks, brownies, blondies and soft pretzels. So clearly the situation called for subterfuge. Scones have been a favorite around here for a long while and I shamelessly stole the idea for chocolate chip drop scones from my friend Beth. What Leif doesn’t and won’t know is that these scones are actually buttermilk biscuits all gussied up. Ha HA! And take that!
These are the most fabulous breakfast treats. They throw together so easily in the morning. Easily enough that I can whip them up even before I’ve consumed my first two cups of tea. Believe me when I tell you that is an accomplishment.
I make this with plain old vegetable oil. I know that isn’t traditional and I know that butter lends more flavor but sometimes you bow to the budget and you’re not worse enough for the wear to change to the more expensive ingredient. This is one of those moments. Feel free to substitute an equal amount of melted, unsalted butter. I’m using the oil because it’s wicked cheaper and just that much easier in the morning. Just keeping it real, folks…
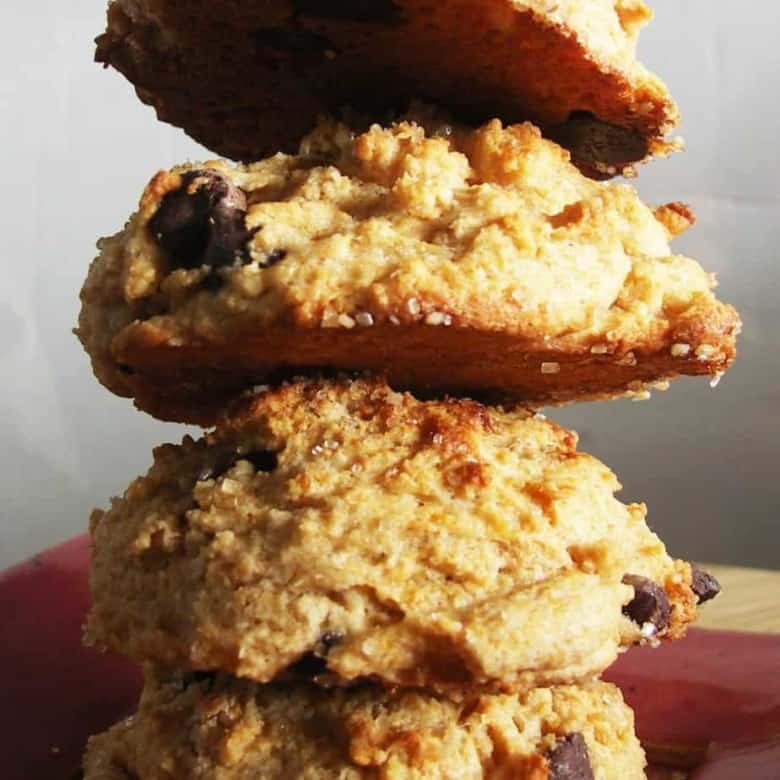
Before baking I topped the scones with a generous sprinkle of demerara sugar. This gave them a lovely sweet crunchy top and, according to the boys, made them look ‘cyber-y’. I’m not sure what that means, but judging from the looks on their faces, it was a deeply moving compliment. I accepted the compliment with the appropriate mix of humility and happiness. At least I think I did. Because I still don’t know what ‘cyber-y’ scones are.
And why are they ‘also known as Breakfast Cookies’? Because Mr. Picky Pants is also capricious and decided that he didn’t like the sound of the word ‘scones’ this morning. And so they magically transformed into Breakfast Cookies. Which he inhaled. Yeah.
I might add that these make a killah afternoon snack or accompaniment for tea. You could really do much worse!
Chocolate Chip Drop Scones (A.K.A. Breakfast Cookies)
Ingredients:
- 2 cups white whole wheat flour (or all-purpose flour)
- 2 teaspoons baking powder (preferably aluminum free)
- 1/2 teaspoon baking soda
- 1 teaspoon sugar
- 3/4 teaspoon salt
- 1/2 cup vegetable or canola oil
- 1 cup buttermilk (or 1 cup soured milk= 1 teaspoon cider vinegar in a measuring cup. Add enough milk to equal one cup, stir well and let sit for 5 minutes prior to using.)
- 1 cup chocolate chips
- coarse raw (demerara) sugar (or granulated sugar) for sprinkling
Preheat oven to 475F.
Line a baking sheet with parchment paper or a silpat. In a medium mixing bowl, whisk together the flour, baking powder, baking soda, sugar and salt. In a large measuring cup, mix together the buttermilk and vegetable oil.
Pour the buttermilk/oil mixture into the dry ingredients and mix gently until most dry spots have disappeared. Add the chocolate chips and stir gently to distribute evenly. The batter will still be lumpy, but there should be no pockets of dry ingredients left.
Scoop by the quarter cup (or use a similarly sized disher) about 2-3 inches apart on the prepared pan. Sprinkle the tops generously with sugar and bake for between 14-18 minutes or until the tops are golden brown and delicious and they are set up. Allow to rest on the pan for five minutes before the hoard of hungry children descends on them. These are best eaten the day they’re made, but I can think of worse things than eating one of these the day after it was baked.


Reader's Thoughts...
Ilona says
I made them today for breakfast – they’re very nice 🙂 But I baked them shorter, they were ready after 12 minutes and I preheated my oven just to 445F. It is great recipe for those who want fast treat and forgot to buy eggs or butter 😉 Many greetings from Poland 🙂
Anna says
I will have actual buttermilk, not cultured, can I still use it in this recipe?
Tina Connelly says
I made these as a dessert-my weapon for getting my oldest son to eat all his dinner. I also altered the recipe to make them allergy-free for my youner son (with the help of Rebecca). I used apple cider vinegar and soymilk in place of buttermilk and vegan chocolate chips in place of typical chocolate chips. They were so tasty. I ate one before dinner and one after. Don’t tell.
Rebecca says
Bellini Valli and Cathy- Thank you for backing me up. They’re super tasty, so I figure all’s fair in love and parenting as long as an active gag reflex isn’t involved…
Cathy - wheresmydamnanswer says
These look great and if a simple word change gets them to eat up – great !!!
Bellini Valli says
Whatever works is allowable. These scones are perfect “cookies”:D