The recipe I am about to share with you is, emphatically, not ‘Dude Food’. Oh sure, guys will eat it. They’ll like it, maybe even love it. But this is designed with me in mind, and I, quite emphatically, did not want ‘Dude Food’ today.
It was bright and sunny and warm and altogether spring-like all day long. I wanted light and flavorful and exotic. This was Made for Mom (me.) Every now and then I think I’m entitled.

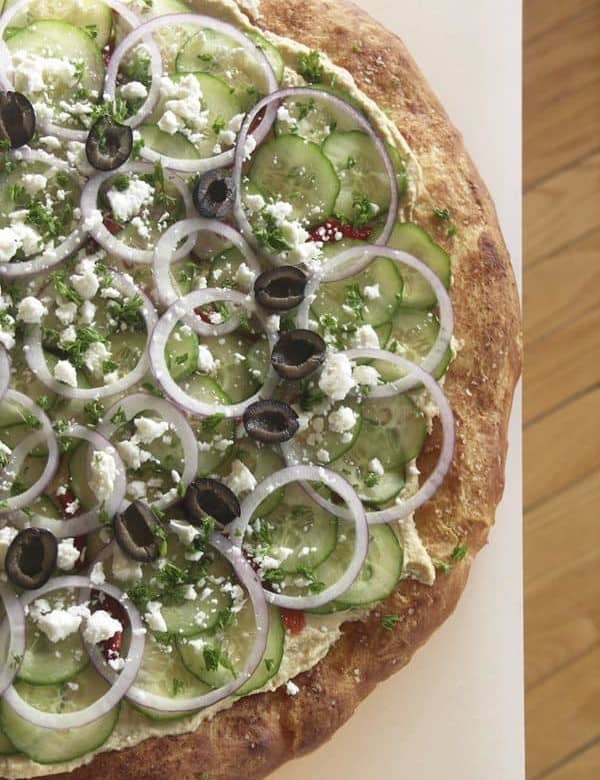
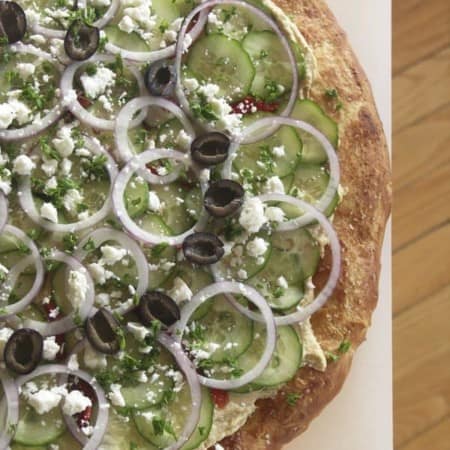
Details: A prebaked pizza crust* topped with silky smooth hummus**, roasted red peppers, paper thin slices of cucumbers and red onions, black olives, crumbled feta cheese and parsley. It is pure freshness. It is the kind of thing I would sit down and devour with my sisters and my mother. But since they didn’t pick up on my brainwaves (so much for female intuition) when the pizza was done, I was forced to eat the majority of the thing myself. This rather defeats the whole light/fresh angle of the dish. The Evil Genius stepped in, ate the last few slices and even uttered a, “Hey. This is really good!” But my mom and sisters? They would’ve been transported by it. They would’ve been ecstatic. They would’ve been rendered speechless. And this would’ve been a good thing. There were a lot of onions on it.
* and ** In both of these cases, homemade is the best bet. If you don’t want to make a pre-baked pizza crust or hummus you can certainly use the store bought equivalents.
This brings me to a really hhhhhhhhelpful hhhhhhhhhhint. (Quit moving away from your computer! There’s no WAY you can smell my onion breath through the monitor. Or can you?) Do you know you can reduce the ‘punch’ that raw onions pack? (Which I did not do today. Obviously. Phew. I’m offendin’ myself.) It’s a pretty simple process; thinly slice or chop your onions as you wish to serve them. Place in a bowl and cover generously with super cold tap water. Let sit for 10 minutes, drain, rinse and repeat at least twice. By the last time you rinse the onions, they should be gentle(r) and mild(er). The stronger your onions are to begin with, the more times you’ll need to rinse your onions. Of course, if you like the powerful bite of March onions, feel free. Just remember I waaahhhhhhhh-rned you.
And not that we need an excuse to make treats for ourselves, but just in case you feel the need to justify it, check out these ‘features and benefits’:
- This is made with chick peas/garbanzo beans. Beans are fantastic for your health; fiber, vitamins, protein, and more are all packed into those tiny little packages.
- Pound for pound, beans are one of the least expensive sources of protein that you can buy. Eat away!
- All those vegetables on top make this indulgence a healthy one. Can’t you feel yourself getting healthier just by looking at a slice?

Mediterranean Hummus Pizza and Pre-Baked Pizza Crusts
Rate RecipeIngredients
- 1 pre-baked pizza crust 12-16", The recipe for an excellent homemade pre-baked crust is listed after the recipe for the pizza.
- 1-1/2 cups prepared hummus
- 1/4-1/3 cup roasted red peppers sliced into thin strips
- 1/2-3/4 of an English cucumber sliced as thinly as possible
- 1/2 of a red onion sliced as thinly as possible
- 1/2 cup black olives thinly sliced or halved
- 1/2 cup feta cheese crumbles
- 1/4 cup fresh parsley minced
Instructions
- Spread the hummus over the crust to within 1/2-inch of the edges.
- Evenly space the roasted red pepper strips over the hummus. Arrange the cucumber slices over the top, then the red onions and black olives. Scatter the feta cheese crumbles evenly over the top and sprinkle the minced parsley over everything.
- Slice into wedges or squares and serve at room temperature.
Nutritional information is an estimate and provided to you as a courtesy. You should calculate the nutritional information with the actual ingredients used in your recipe using your preferred nutrition calculator.
did you make this recipe?
Make sure to tag @foodiewithfam on Instagram and #hashtag it #foodiewithfamily so I can check it out!

Pre-Baked Pizza Crusts
Yield: 3 large pre-baked crusts
Ingredients:
- 3 cups warm (but not hot) whey or milk
- 3-1/2 Tablespoons instant yeast
- 1/4 teaspoon sugar
- 2 teaspoons Kosher salt, plus additional for sprinkling over dough
- 1 pound and 13- 3/4 ounces (7 cups) all-purpose flour
- 3 Tablespoons olive oil, plus additional for spreading over dough
- 3/4 teaspoon granulated garlic, plus additional for sprinkling over the dough (you can substitute minced fresh garlic if necessary.)
Place the warm whey or milk in a very large mixing bowl and sprinkle the yeast and sugar over the top. Swirl the bowl and let sit for five minutes. Add the remaining ingredients and stir until an evenly moist and a cohesive dough forms. Cover with a clean dish towel and let rise for 20 minutes.
Preheat oven to 500°F.
Generously grease three large, round pans (or rimmed sheet pans) with olive oil. Wet your hands and divide the dough into three equal portions. With wet hands, spread the dough on your oiled pans. Allow the dough to rest for five more minutes, wet your hands again, and re-work the dough toward the outer edges of the pan. Brush or rub the dough generously with olive oil and sprinkle lightly with granulated garlic or minced garlic.
Bake pizza crusts for 8 minutes if you want a partially baked crust to be topped and baked again later, or 12 minutes for a fully baked crust.
Remove crust from pan and cool on a rack. You can use immediately or wrap tightly with a double thickness of plastic wrap and frozen for a month.
~~~
Now, the question is this; is anyone in need of a good hummus recipe? Because I’m willing to share…


Reader's Thoughts...
Food Tasted says
Really melty! It remembers me some French cheesy specialities
Marla says
This pizza looks amazing. Such a great idea! Thanks for adding it to our Get Grillin’ Round up 🙂
Rebecca says
Patrick- It’s up, my friend!
SueEllen- Done and done!
C Dresden- That sounds out of this world. I’m going to try that next time!
Natalie- I hope you get to try it soon. It screams “SPRING!”
Jen- Hummus recipe is up. And the dough can be frozen prior to baking with no problem, but you’ll need to thaw it for 24 hours in the fridge prior to using.
Jen says
I would LOVE a hummus recipe!! Also, could I freeze the dough before baking it? But I made the crust and it was DELISH!!
Natalie (The Sweets Life) says
i cannot WAIT to give this a try! This looks incredible!!!
C Dresden says
Very inspirational!
I’ve done something very similar before, differences being mainly that I used a crust made with a bit of dark rye flour, and that I used oil-cured black olives, because I’m addicted to them. But I love the cucumbers, and the whole thing looks terrific.
sueellen says
actually, I JUST bought tahini, chickpeas and dried Indian chili peppers to make some hummus. Give it to me, friend (the recipe, that is).
Patrick says
It’s funny, just this week I was wondering if you had a good hummus recipe and was going to email you about it.
Seriously.