I had girlfriends coming over for lunch with kids in tow a couple of weeks ago: girlfriends with lots of kids like me. My plan was to present a GIANT plate of Party Hummus and homemade pita chips. The problem was that it was HOT and I ran out of time and WHADDYAKNOW, no one in Amish country sold pita bread. I turned to my pantry and coated some nice corn tortillas with oil and za’atar and baked them for crispy Za’atar Tortilla Strips. The result was even better than the planned for pita chips. Crispy, crunchy, and utterly dippable, these crispy Za’atar Tortilla Strips had the bonus of being gluten-free, which made it possible for ALL my guests to eat them! And -mercy!- they paired beautifully with the hummus!
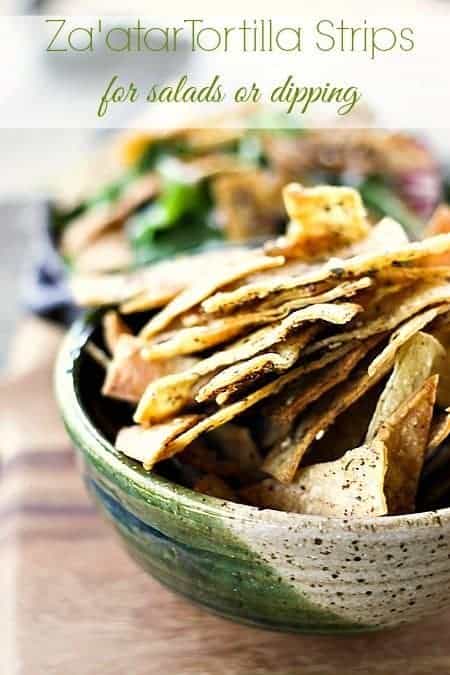
Dip and crunch. Dip and crunch. That’s my favourite way to pass the day. Thankfully, my girlfriends love to dip and crunch, too. And thankfully, this snacky hail-Mary ended up being even better than planned for four major reasons.
- They just plain tasted better.
- One of my friend’s daughters has celiac disease, and the corn tortillas were gluten-free so she could eat them! SCORE!
- I was able to make a MASSIVE amount of them at a very low cost. Pita bread/chips would’ve been far more expensive for an equivalent amount.
- They were so versatile. They were great for dip, but they also made perfect, ready-to-go croutons for salad.
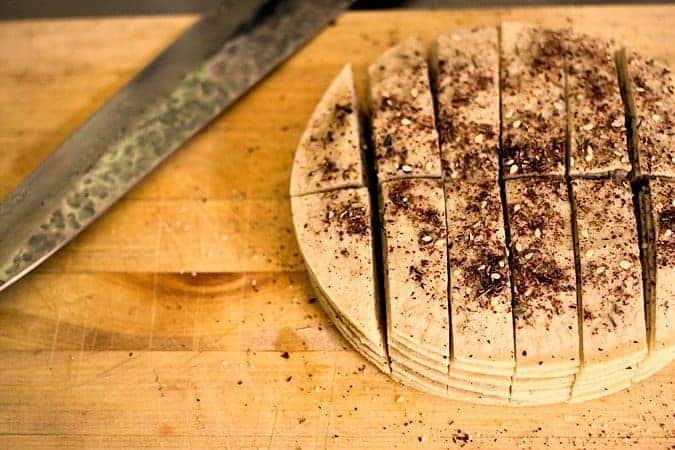
So. Is anyone asking what za’atar is? It sounds fancy-pants, to be sure, but it’s such a familiar flavour profile with its blend of thyme, oregano, marjoram, toasted sesame seeds, salt, and (the only possibly unfamiliar ingredient) dried sumac*. Sumac has a citrusy flavour that brightens up the other herbs in the blend; it’s a little lemon-y. Good stuff! I love it so much that I put it on just about everything: popcorn, rice, salad, pizza (yes, it’s GOOD), grilled chicken, pork, FISH (oh DO put it on fish!), and veggies.
Oh, hey. Yeah. I love it so much, I have a handy-dandy recipe for it right here! Of course, you can purchase ready made za’atar![]() but that takes half of the fun out of it. Homemade za’atar is also quite a bit less expensive if you buy your spices in bulk.
but that takes half of the fun out of it. Homemade za’atar is also quite a bit less expensive if you buy your spices in bulk.
Cook’s Notes
- Any good corn tortilla will make a good tortilla strip! It doesn’t have to be expensive, just tasty.
- I don’t advise subbing in flour tortillas for this application. They won’t be as sturdy for dipping and the flavour won’t be as robust.
- Make more than you think you’ll need. It’s dead easy, the oven’s already heated up, and you’ll find yourself sneaking them from the bowl quite often.
- Remember that -as most baked goods do- the tortilla strips will continue to crisp and darken after being taken from the oven. Don’t wait until they look perfect to pull them.
- If you have leftovers, store them at room temperature in an airtight container.
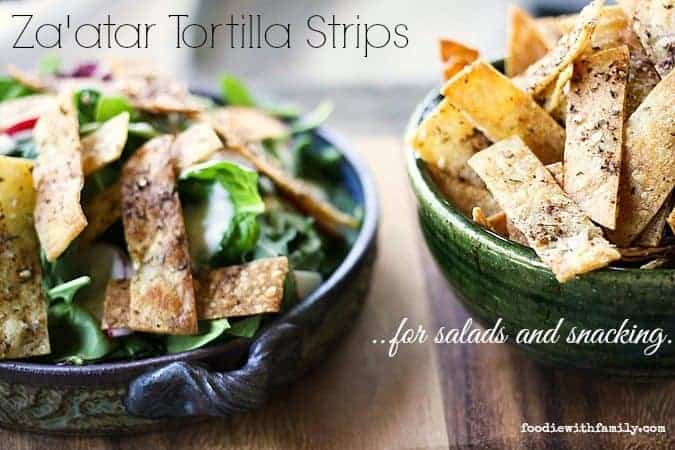
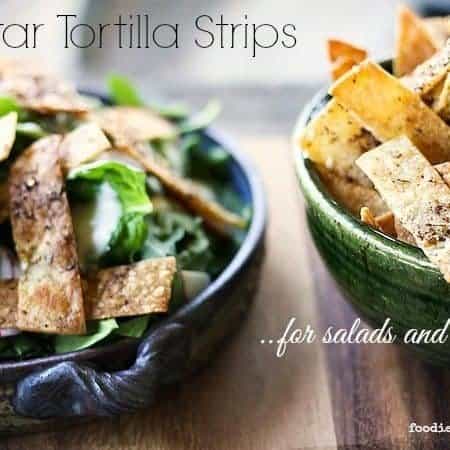
Za’atar Tortilla Strips for Salads and Snacks
Rate RecipeIngredients
- 10 corn tortillas
- extra virgin olive oil for brushing
- 1/2 teaspoon of za'atar per tortilla for a total of 5 teaspoons za'atar
Instructions
- Preheat oven to 350°F.
- Brush a corn tortilla on both sides with extra virgin olive oil, sprinkle with 1/2 teaspoon of za'atar on one side. Brush a second corn tortilla with oil, stack on top of the first tortilla, sprinkle with another 1/2 teaspoon of za'atar, and repeat until all of the tortillas have been brushed and sprinkled. Cut the tortilla stack in half, then turn 90° and cut into 1/2 to 3/4 inch strips. Spread them in a single layer on cookie sheets and bake them, rotating the pans front to back halfway through, about 8 to 12 minutes. Let the strips cool on the pans.
Nutritional information is an estimate and provided to you as a courtesy. You should calculate the nutritional information with the actual ingredients used in your recipe using your preferred nutrition calculator.
did you make this recipe?
Make sure to tag @foodiewithfam on Instagram and #hashtag it #foodiewithfamily so I can check it out!


Reader's Thoughts...
Debbie says
Question: to make the Za atar, does one use the dried sumac berries or is there another form of the plant that is preferable? Not sure what to get…..
Jenn @ Deliciously Sprinkled says
I love these, can’t wait to make them! 🙂
Kirsten/ComfortablyDomestic says
Love where you were going with the za’atar pita chips–they’re a favorite of mine as dippers. Corn tortillas are an excellent stand in, and much more economical!
Nutmeg Nanny says
These look amazing! I love za’atar anything!
Lauren @ Healthy Delicious says
GAH. I looove zaatar and these are just brilliant. I always have a zillion leftover tortillas lying around. Now I’ll have a way to use them up!
Kellie @ The Suburban Soapbox says
I’ve been trying to locate za’atar in my local grocery store with no luck. I have so many ideas for it, just can’t seem to get my hands on some. These look fabulous and I would love to try them….as soon as I score my own za’atar. 🙂
Sarah | The Sugar Hit says
I’m so into za’atar at the moment. These are right up my alley. Perhaps dangerously so.
Meseidy says
I love saying Za’tar it makes me feel like a genie casting wishes. 😀 Who needs the salad!? I just want to snack on them.
Kim (Feed Me, Seymour) says
I’ve never had za’atar but it definitely sounds like something I’d love!
valmg @ From Val's Kitchen says
I hadn’t heard of za’atar before myself. It sounds interesting. Is sumac a relation to the poisonous plant?
Rebecca says
I think they’re KIND of related, but this is totally safe stuff… Ya know, unless you’re allergic… but that applies to all foods!
Happy Valley Chow says
What a fantastic recipe! I love homemade tortilla strips like these and I loved that you baked them. But, I might have some issues getting my oven up to 3505 F 😛 Thanks for sharing 🙂
Hanna says
Mmmmmm….
These look familiar!
Thanks for thinking of the Celiac Kid. We lurved them!
Carol at Wild Goose Tea says
It’s an old saying but it works here—-something about the Mother of Invention yada yada yada. Well done. Not having the pita bread and developing this idea also makes for great little foodie short story—and this blog.
Brenda@SugarFreeMom says
I’m a lover of dipping and crunching!
Ginny McMeans says
I think I LOVE these chips! I have to make them!
The Food Hunter says
great idea…
Lauren kelly Nutrition says
These tortilla strips leave me speechless. How incredibly GENIUS!