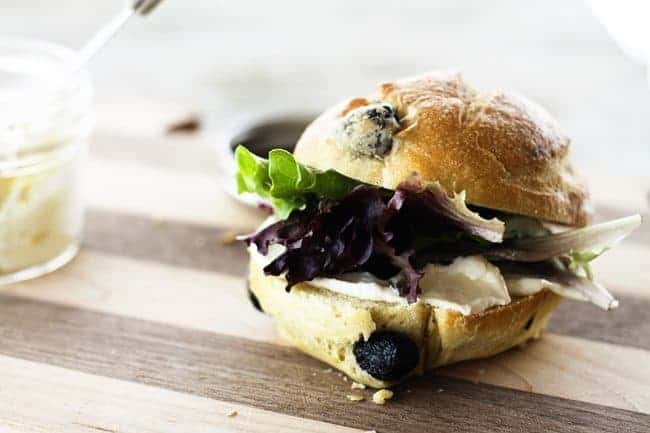
Black Olive Sandwich Rolls
These fabulous sandwich rolls have a chewy outer crust, yielding and soft inner crumb and enough oil-cured olives to make any olive-loving heart sing.
Ingredients
- 4 cups all-purpose flour 1 pound, 1 ounce, by weight
- 2 cups semolina flour 11½ ounces, by weight
- 3 teaspoons SAF or instant yeast
- 3 teaspoons kosher salt
- 2 tablespoons sugar
- 4 tablespoons extra virgin olive oil
- 2 cups lukewarm water 16 ounces, by weight or volume
- 1 1/2 cups pitted oil-cured or kalamata olives broken up coarsely with your hands
- 1/2 cup water
- 1/2 teaspoon cornstarch
Instructions
To Mix Dough By Hand:
- Add all ingredients except for olives, cornstarch and 1/2 cup of the water to a large mixing bowl and stir together with a sturdy wooden spoon until you form a shaggy but cohesive dough. Let the dough rest for 30 minutes, covered with a clean towel. Turn out onto a lightly floured counter top and knead until smooth and elastic, about 10 minutes. Transfer dough to a clean bowl, cover with a damp towel and let rise in a warm, draft-free place until doubled in size, about 2 hours.
To Mix Dough By Stand Mixer:
- Add all ingredients except for olives, cornstarch and 1/2 cup of the water to the work bowl of your stand mixer fitted with the dough hook. Turn mixer onto the lowest setting and mix until a shiny, elastic dough forms. Remove the bowl from the mixer, cover the bowl with a damp towel and let rise in a warm, draft-free place until doubled in size, about 2 hours.
To Mix Dough By Bread Machine:
- Add all ingredients except for olives, cornstarch and 1/2 cup of the water to the pan of your bread machine that has been fitted with the dough paddle(s). Set the bread machine on the dough setting and press start. When the cycle is completed, proceed with shaping…
To Shape the Rolls:
- Line two baking sheets with silpats or parchment paper. Set aside.
- Turn the dough out onto a clean and very lightly floured surface or silicone mat. Roll it out into a rectangle that is about 12-inches by 18-inches. Scatter the olives over the surface of the dough, leaving about an inch clear of olives on the side farthest from you.
- %https://www.foodiewithfamily.com/wp-content/uploads/2013/03/Black-Olive-Rolls-1.jpg
- Gently lift the edge closest to you and fold away from yourself over the olives.
- %https://www.foodiewithfamily.com/wp-content/uploads/2013/03/Black-Olive-Rolls-2.jpg
- Continue to carefully lift and roll the dough away from you until you have a long tube. Pinch the seam closed.Use a bench knife or serrated knife to cut the dough into 16 equally-sized pieces.
- %https://www.foodiewithfamily.com/wp-content/uploads/2013/03/Black-Olive-Rolls-3.jpg
- %https://www.foodiewithfamily.com/wp-content/uploads/2013/03/Black-Olive-Rolls-4.jpg
- Hold a piece of dough with the cut sides out. Use your thumbs to pull the top of the dough over the cut sides toward the bottom. Push that up under the roll toward the center, rotate the dough ball a half turn and repeat. Put the dough ball on the counter and cup your hand around it, rotating in one direction until the top of the dough is taut. (See the video in the blog post for an example of how to do this.) Place this on your lined baking sheets. Repeat, leaving plenty of room between the rolls for expansion in rising and baking.
- %https://www.foodiewithfamily.com/wp-content/uploads/2013/03/Black-Olive-Rolls-5.jpg
- Cover the rolls with a tea towel and let rise in a warm, draft-free place for about 30 minutes, or until they look a little puffy.
- While they rise, use a fork to whisk a small amount of the water into the cornstarch in a microwave safe container or a small saucepan, forming a paste. Use the fork to whisk in the remaining water and microwave on HIGH for 30-60 seconds or boil until it is glassy.
- %https://www.foodiewithfamily.com/wp-content/uploads/2013/03/Black-Olive-Rolls-6.jpg
- Preheat the oven to 400°F. Brush the rolls with the cornstarch glaze and use a sharp knife to make three to four cuts of about 1/8-inch deep each to the top of the roll. I like to do a scallop pattern, but you could also do a tic-tac-toe pattern. This allows the roll to expand while baking without tearing that beautifully taut top you worked so hard to create.
- Bake for 23-26 minutes, or until deep golden brown. Remove the pan from the oven and transfer the rolls to a wire rack to cool completely before slicing. These are good for up to three days.
Nutritional information is an estimate and provided to you as a courtesy. You should calculate the nutritional information with the actual ingredients used in your recipe using your preferred nutrition calculator.
did you make this recipe?
Make sure to tag @foodiewithfam on Instagram and #hashtag it #foodiewithfamily so I can check it out!