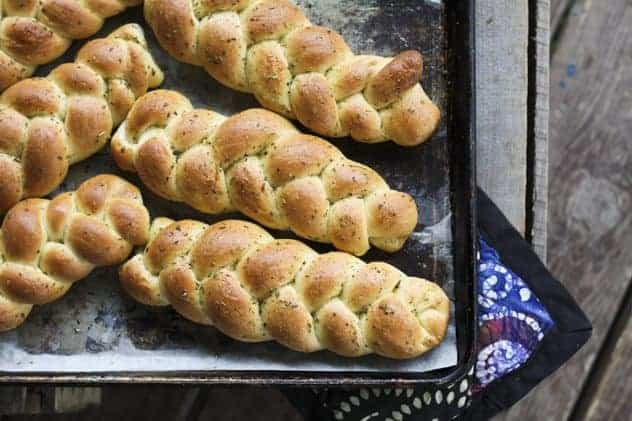
Individual Garlic Braids
Put one of these tender, golden-brown, garlic and herb brushed braids next to dinner plates and watch faces light up. The day's burdens ease a bit, the tension melts away like warm butter on hot bread, and the conversation flows just a bit more easily.
Ingredients
- 4 cups 1 pound, 1 ounce, by weight all-purpose flour
- 2 cups 11 1/2 ounces, by weight semolina flour
- 3 teaspoons SAF or instant yeast
- 3 teaspoons kosher salt
- 4 tablespoons sugar or non-diastatic malt powder
- 4 tablespoons extra virgin olive oil
- 2 cups 16 ounces, by weight or volume lukewarm water
- 1/3 cup extra virgin olive oil
- 3/4 teaspoon granulated garlic or 1 clove fresh garlic, minced
- 1 teaspoon dried Italian seasonings
Instructions
To Mix Dough By Hand:
- Add all ingredients except oil, garlic, and seasonings to a large mixing bowl and stir together with a sturdy wooden spoon until you form a shaggy but cohesive dough. Let the dough rest for 30 minutes, covered with a clean towel. Turn out onto a lightly floured counter top and knead until smooth and elastic, about 10 minutes. Transfer dough to a clean bowl, cover with a damp towel and let rise in a warm, draft-free place until doubled in size, about 2 hours.
To Mix Dough By Stand Mixer:
- Add all ingredients except the oil, garlic and seasonings to the work bowl of your stand mixer fitted with the dough hook. Turn mixer onto the lowest setting and mix until a shiny, elastic dough forms. Remove the bowl from the mixer, cover the bowl with a damp towel and let rise in a warm, draft-free place until doubled in size, about 2 hours.
To Mix Dough By Bread Machine:
- Add all ingredients except the oil, garlic and seasonings to the pan of your bread machine that has been fitted with the dough paddle(s). Set the bread machine on the dough setting and press start. When the cycle is completed, proceed with shaping…
To Shape the Dough:
- Turn the dough out onto a clean surface and form into a neat mass. Divide into 3 equally sized pieces. Divide each of those pieces in half. This will give you 6 pieces all together. Cover all but one piece with a tea towel.
- Divide that one piece into 3 equally sized pieces.
- Roll each piece lightly with the hands to form a rope between 10 and 12 inches long. Repeat with the other two pieces so that you have 3 ropes of roughly equal length. Line them up in parallel with the ends facing you.
- Gently grasp the end of the rope on the far left. Lift it to about the center, leaving the far end on the counter, cross it over the rope nearest to it and lay it down. Now grasp the end of the piece on the far right and lift it to about the center, leaving its far end on the counter, cross it over the (now) center rope (which is the first one you moved) and lay it down. This is the manoeuver you will repeat – far left over center, far right over center, and so on- until you have ends too short to continue. At that point, pinch the ends together and tuck under the braid. Now go back to the center of the loaf and finish braiding the loaf toward the top. When you reach the ends, pinch together and tuck under. Transfer the braid to a parchment lined baking sheet and repeat with the remaining pieces of dough. (For a photographic how-to on braiding bread, visit this post .) Let rise in a warm place until puffy in appearance and about doubled in size.
- While dough is rising, stir together the olive oil, garlic and Italian seasonings and preheat the oven to 400°F.
- When the braids are puffy, brush generously with the olive oil mixture then bake on the center rack of the oven until deep golden brown, about 18-20 minutes.
- Brush the finished bread again with the remaining olive oil mixture and let cool at least 10 minutes before eating.
Nutritional information is an estimate and provided to you as a courtesy. You should calculate the nutritional information with the actual ingredients used in your recipe using your preferred nutrition calculator.
did you make this recipe?
Make sure to tag @foodiewithfam on Instagram and #hashtag it #foodiewithfamily so I can check it out!