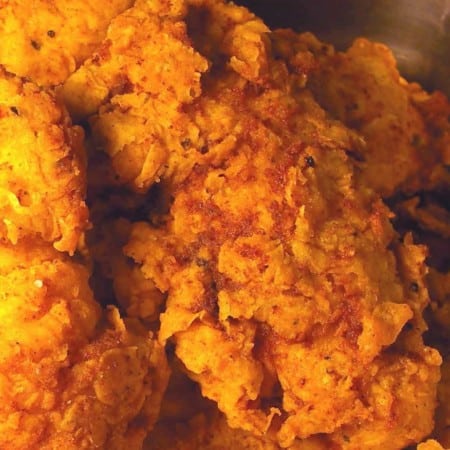
Extra Crispy Fried Chicken Fingers
These super crispy, flavourful fried chicken strips are chicken done right. A little garlic and onion in the breading ensures serious taste with your crunch. The breading method itself seals in all those great chicken juices.
Ingredients
- 1 1/2 pounds boneless skinless chicken breasts or thighs
- 6-8 cups canola or peanut oil for frying
- 1 egg
- 1 cup buttermilk for best flavor or milk
- 2 cups all-purpose flour
- 1 Tablespoon Montreal Steak Seasoning or generic version
- 1 teaspoon kosher salt
- 1 teaspoon fresh coarse ground black pepper
- 3/4 teaspoon MSG strictly optional. If you have an aversion or sensitivity to this, please omit it!
- 1/2 teaspoon paprika
- 1/2 teaspoon garlic powder preferably granulated garlic
- 1/2 teaspoon onion powder preferably granulated onion
Instructions
- In a large bowl, mix together the flour, steak seasoning, salt, pepper, MSG, paprika, garlic and onion powder with a fork or whisk. Divide the seasoned flour between two pie plates or cake pans. Line a pan or cooling rack with paper towels or newspapers. Set flour and towel lined pan aside.
- Pour oil into a large, deep, heavy-bottomed pan (or fryolator, fry-daddy or other frying apparatus) over medium to medium-high heat. Remember this rule of thumb when deep-frying on your stove-top: "Never fill your pan more than halfway full of oil." Remember that liquids rise higher as they boil and that you'll also raise the level of the oil each time you drop something else into it ('Law of Displacement' if you're physics-minded...) And since this is The Evil Genius's cooking show today, I'll quote him, "You can't argue with physics. It is or it isn't." If you have a thermometer, you're shooting for 350°F. If you don't have a thermometer, don't sweat it. Just heat it until the tip of one of the breaded chicken fingers dipped into the oil results in many, many enthusiastic bubbles flying up around the edges of the chicken.
- Add egg and buttermilk to a medium-sized mixing bowl and whisk to combine thoroughly. Set aside with the flour.
- Trim the chicken breasts or thighs and slice lengthwise into about 3 largish strips. (If you have really small breasts- quit snickering- just slice into two strips.)
- Now, let's prepare to fry. Lay out your ingredients -assuming you have a counter near your stove and your oil is ready to go- like this starting closest to the stove: one bowl with flour, bowl with buttermilk/egg mixture, other bowl of flour, cutting board with chicken on it. Decide on which hand you're going to use. Use your hand and work with one piece of chicken at a time. Drag it through the flour so it is evenly coated and shake the extra off. Dredge (drag through) the floured piece of chicken in the egg/buttermilk mixture, shake off the excess. Dredge the gooey piece of chicken through the last bowl of flour, making sure it is well coated and gently shake off the excess. Finally, using your gooey-gross right hand gently slide that fully-coated piece of chicken into the oil. Whatever your impulse may be, DO NOT THROW THE CHICKEN IN THE OIL. That is how burns happen. Trust me. You're much better off and much safer gently allowing the chicken to slide from your hands near the surface of the oil. And this is where using your one hand to do all that dredging and dipping and dunking pays off. You have so much goo on your hands that no oil is going to penetrate to your skin in the short amount of time it takes you to carefully place a piece of chicken in the oil.
- By coating one piece at a time, you're ensuring that they won't stick together in the oil. Each piece gets a few moments to start cooking and forming its crust before another gooey piece is eased into the oil.
- Stir the chicken gently with tongs and allow to cook for between 8-15 minutes, depending on how thick your chicken strips were. If it is browning too quickly, lower the heat a bit. The best way to test the chicken is to remove a thick piece to a cutting board. Slice into the thickest part of the chicken. If the juices run clear it is done!
- Transfer hot chicken to the towel lined pan and allow to cool for at least 5 minutes before eating. You really don't want to bite into it right away unless you'd like to rid yourself of the skin inside your mouth. These little beauties are screaming hot!
Nutritional information is an estimate and provided to you as a courtesy. You should calculate the nutritional information with the actual ingredients used in your recipe using your preferred nutrition calculator.
did you make this recipe?
Make sure to tag @foodiewithfam on Instagram and #hashtag it #foodiewithfamily so I can check it out!