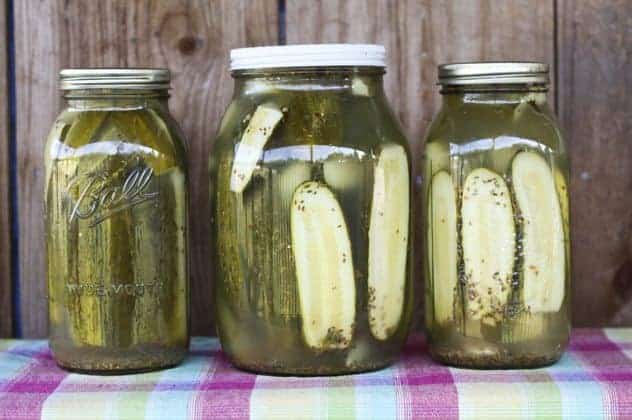
Garlic Dill Pickles
Garlic dill pickles are sour, salty, and flush with the classic dill pickle assemblage of spices. This recipe is per quart, so scale up if you have a large clan (or an out-of-control pickle habit).
Ingredients
For each quart of pickles you will need:
For the spices:
- 3-4 heads fresh dill or 1 Tablespoon dried whole dill seed- not weed.
- 2-3 large cloves garlic peeled
- 12 whole black peppercorns
- 1/2 a small bay leaf
- 1/4 teaspoon whole mustard seed
- 1/2 teaspoon crushed red pepper flakes or 3 dried habaneros optional
For the brine:
- 1 cup cider or white wine vinegar Cider gives you a more classic pickle flavor, white wine gives you a more delicate pickle.
- 2 cups water
- 1 Tablespoon pickling salt That's basically any non-iodized salt. Kosher salt works well here.
For the pickles:
- 2 pounds pickling cucumbers
Instructions
- Clean and sterilize your jars, lids and rings and a ladle or heat-proof measuring cup with a handle, and a chopstick or butterknife. You can do this one of two ways. Either wash in your dishwasher and use the heat dry cycle or immerse jars and rings, ladle and butterknife in boiling water for five minutes and hold in the hot water while preparing the cucumbers. To sterilize the lids with boiling water, place them in a bowl and pour the boiling water over them. I opt for the dishwasher. Getting a dishwasher changed my canning life!
- To make the pickles, scrub the cucumbers and take a small slice off the blossom end of the cucumber. Taking off about 1/16" from the end of the cucumber is a little more crunchy pickle insurance. If left intact, the blossom end can release a compound that causes soft pickles.
- If needed, trim cucumbers down to a size that will fit in your jars.
- Now for the fun part (and I mean that!)
- Eyeball your cucumbers and make a rough estimate of how many jars you'll be filling. Line your jars up on the counter and into each of them put the spices and garlic listed above in the quantities given. Pack the cucumbers in on top of the spices and garlic. Don't squish the cucumbers when packing them in, but you don't have to be shy about trying to make the most of the space available in the jar, either. Leave 1/2" of space between the top cucumber and the rim of the jar. This is called headspace and it is important in creating the seal that stands between your delicious food and nasty bacteria and mold.
- Scale the brine recipe to the appropriate level (Are you making 4 quarts? Use 4 cups cider vinegar, 8 cups water, 4 Tablespoons pickling salt, etc...) Add all brine ingredients to a large stockpot and bring to a boil. While still boiling, pour (I use a ladle for the job) into cucumber filled jars. Again, respect the 1/2" headspace.
- You may find that you need to pour a little more brine in after it settles into the spaces. This is fine. When you've brined all your jars, gently insert your sterile chopstick or butterknife down the sides of the jar to release air bubbles. If you need to add more brine at this point to reach the 1/2" mark, do so.
- *If you have leftover brine, don't sweat it. You can save it in the fridge for your next batch of pickles or use it to cook beet greens, or any number of other things. It's better to make more than you think you need so that you don't have to scramble to prepare more brine before processing your pickles!
- Using a clean paper towel, gently wipe the rims of the jars, place a clean lid on the jar and thread a ring onto the jar to keep the lid in place. Don't crank on the ring with brute force. It's not the ring that is protecting your food. The ring merely holds the lid in place until a good seal forms. Just turn it until it provides resistance. This will hold the lid on tight enough to prevent water from entering the jar, but loose enough that air can be forced out of it during processing.
- When all your jars are filled, turn your attention to processing. You'll need a pot with a tight fitting lid deep enough to allow boiling water one inch higher that your tallest jar when full of jars. To test this, place filled jars (with tightened lids and rings) in the pot. Fill with water to one inch higher than the tallest jar. Leaving the water in the pot, carefully remove jars. Place pot over burner, cover, and bring to a full boil. When water reaches a rolling boil, carefully place jars in the pot. (It is helpful, but not strictly necessary, to have a spiffy rack for raising and lower jars in the pot. You can also make due with a long silicone oven mitt or a jar lifter- another nifty canning gadget.)
- Put the lid on your pot and bring water back to a rolling boil. Once it reaches a rolling boil, start timing! For quart jars you process them for 20 minutes. For pints, process for 15 minutes. Do not underprocess these jars. The processing time is your safety mechanism. It kills nasties that might be on or in the jars and it kick-starts the melding of the flavors. Contrary to what seems might happen, underprocessing can result in mushy, soft pickles. Ewwwww.
- When processing time is up, carefully remove jars to a sturdy cooling rack over a dish towel. As the jars cool, you'll occasionally hear a "pop" sound. Don't freak out. This is a good thing. This is the sound of the jars sealing. Allow the jars to cool overnight. In the morning, use a damp paper towel to wipe down the jars and check the seals. If you press gently in the center of the lid it should not give at all and should not pop back up. If you have some seals that failed, don't worry. Just store those in your fridge! They're still good to eat, they're just not shelf-stable. Label your jars with their contents and the date they were made. They will be ready to eat in 6 weeks.
Nutrition
Calories: 11kcalCarbohydrates: 1gSodium: 440mgPotassium: 90mgVitamin A: 60IUVitamin C: 1.9mgCalcium: 13mgIron: 0.2mg
Nutritional information is an estimate and provided to you as a courtesy. You should calculate the nutritional information with the actual ingredients used in your recipe using your preferred nutrition calculator.
did you make this recipe?
Make sure to tag @foodiewithfam on Instagram and #hashtag it #foodiewithfamily so I can check it out!