
My friend Mary took me out to eat at Rusconi’s American Kitchen while I was visiting her in Phoenix and steered me toward the Roasted Garlic Artichoke Goat Cheese Fondue on the menu saying that she knew I would love it.
She was right. She was so right that as I ate it, I was reverse engineering the recipe in my head because I knew I couldn’t fly to Phoenix every time I wanted to eat it and I was going to want it often!
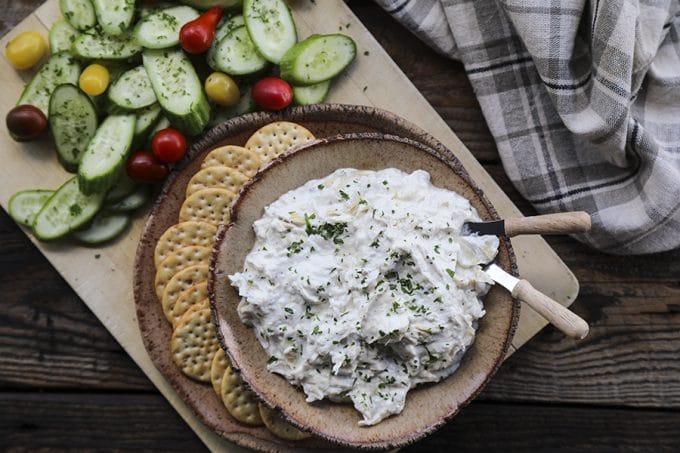
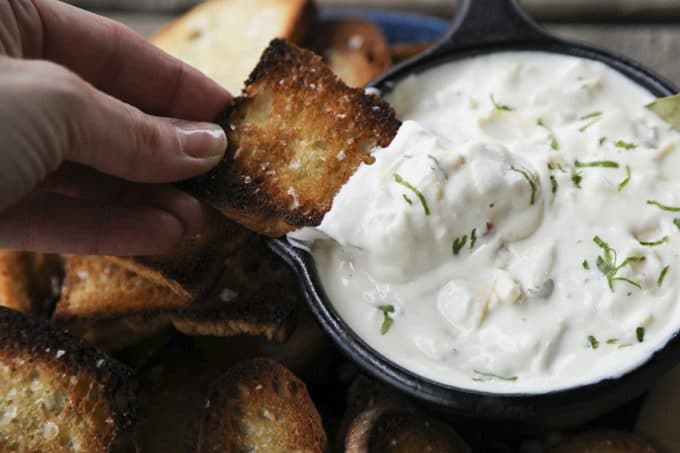
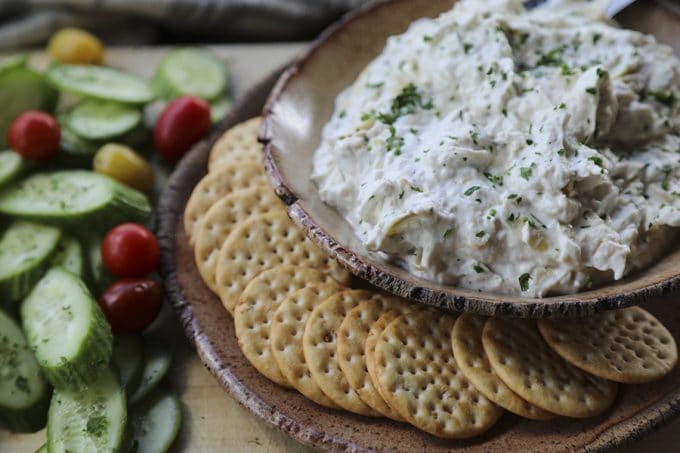
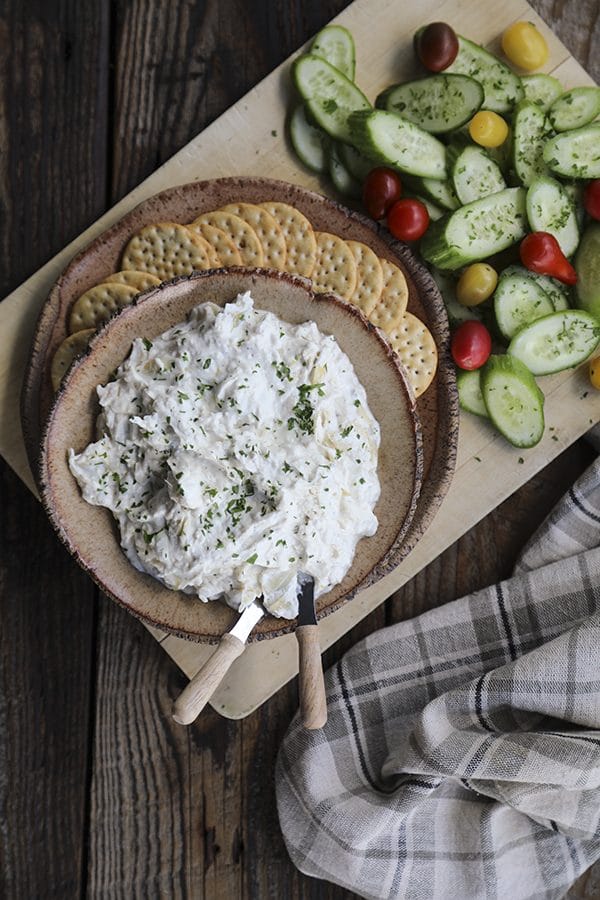
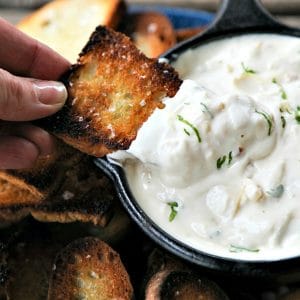
Warm, garlicky goat cheese dip with tender pieces of marinated artichoke heart is perfectly dippable for crackers, vegetables, crusty bread, and pretzels, but it isn’t just a one-trick pony, as fabulous as that pony is.
When it’s room temperature or cold, it makes the most incredible spread for turkey, chicken, or roasted vegetable sandwiches. You’ll want to have this on hand all the time!
What kind of cheese should I use for fondue?
There are many, many fondue recipes out there made with all sorts of cheese. Goat cheese fondue is my personal favourite, though. It’s every bit as creamy and indulgent tasting as fondues made with Swiss, Gruyere, and other cheeses, but it’s far simpler to make and only requires 6 ingredients.
In addition to the ease with which goat cheese fondue is made, it’s a little gentler on the waistline than traditional cheese fondues.
A word about which goat cheese you should use; this recipe is designed to be made with chevre, which is also known as soft goat cheese. You’re best off choosing a plain soft goat cheese. Please don’t use a flavoured goat cheese in your goat cheese fondue. It just won’t taste the same.
Don’t choose a firm or semi-firm goat cheese for this fondue, either, as it is designed to be made with soft goat cheese only!
How do I make Goat Cheese Fondue?
You’re in luck. Roasted Garlic Artichoke Goat Cheese Fondue is one of the easiest and most versatile fondues you can possible make. All you need to do is smash some roasted garlic cloves, melt them together with some goat cheese, then add in some milk or cream, chopped artichoke hearts, and black pepper.
It’s honestly that easy. I made a video to show you just how simple the process is!
Goat Cheese Fondue
It isn’t strictly necessary to allow the goat cheese to come to room temperature before you melt it in the pan, but I find it does speed up the actual process of making the goat cheese fondue. Don’t worry if you didn’t remember to let it warm, though… it’ll just take a couple more minutes in the pan.
When it comes to roasted garlic, it’s certainly easy to make your own roasted garlic, but when I’m in a big hurry, the Mediterranean Bar at Wegman’s is my best friend. I can grab roasted garlic on my way home from ballet and have fondue the same night.
I’ve given options for the dairy used to think out the goat cheese fondue; you can use whole milk or heavy cream. Heck. If you’d like, you can use goat milk.
My personal preference is for the whole milk, but any of those will work. Start with the amount given in the recipe, keeping in mind that the fondue will thicken as it cools. If you want to thin it out for a more dippable than spreadable fondue, you can add a tablespoon of milk at a time until it reaches your desired consistency.
Use this to make Roasted Garlic Artichoke Goat Cheese Fondue
Are you looking for some great bread to serve with your goat cheese fondue? Try this Sesame Braided Semolina Bread, Everything Soft Pretzels, Onion Dill Sour Cream Bread, Jalapeno Cheddar Bread, Easy Garlic Knots, Pretzel Bread, Black Olive Rolls, bread, No-Knead Cottage Cheese Dill Bread, and bread! While you’re at it, serve it spread on these Rosemary Croccantini Flatbread Crackers, Chicken Caesar Sandwiches with Bacon, Roasted Sweet Potato Black Bean Burgers, and with a Lady Greyhound Cocktail.
For more excellent bread recipes to serve with your goat cheese fondue, check out our full collection of bread recipes! If you want to check out another cheesy (in a good way) appetizer, try out our Provoleta – Argentinian Grilled Cheese Appetizer.
It’s also a lovely accompaniment to this 1-Pot Roasted Turkey Breast Dinner or Ham and Swiss Twisted Sandwiches.
Roasted Garlic Artichoke Goat Cheese Fondue
Rate RecipeIngredients
- ⅓ cup roasted garlic cloves
- 14 ounces goat cheese softened to room temperature
- Juice of one lemon
- ⅓ cup whole milk or heavy cream
- ½ cup marinated artichoke hearts roughly chopped
- Black pepper to taste
Instructions
- Smash the garlic cloves in the bottom of a small saucepan over low heat. Add the goat cheese and lemon juice and stir, gently melting the goat cheese. Stir in the milk or heavy cream and the artichoke hearts until the sauce is evenly smooth. Season with black pepper to taste. Serve with crackers, vegetables, bread, or breadsticks. It can also be chilled and used as a sandwich spread.
Video
Nutrition
Nutritional information is an estimate and provided to you as a courtesy. You should calculate the nutritional information with the actual ingredients used in your recipe using your preferred nutrition calculator.
did you make this recipe?
Make sure to tag @foodiewithfam on Instagram and #hashtag it #foodiewithfamily so I can check it out!


Reader's Thoughts...
Andrea says
My husband & I don’t like feta or goat cheese. What would be good to substitute?
Rebecca says
Hi Andrea- Unfortunately, I can’t give you tested advice because I only tested it with those two cheeses. Cream cheese might work, but please remember I haven’t tried it!
Sam says
AAHHHH! SO YUMMY! I can’t tell you how much I loved this, and I was skeptical with goat cheese just because I’ve never had it before. Yum!! Thanks for sharing!
Tamara says
Um, yes please! Three of my favorite things! I cannot wait to try this recipe!
Rebecca says
It’s three of my favourite things, too! I hope you love it like I do!
Snegolenka says
My beloved men son and husband will definitely appreciate this culinary masterpiece! I’ll definitely prepare this on the weekend! Thank you and the recipe! And for a delicious photo of a special thank you! Continue in the same spirit.