Big Batch Fruit Crisp Topping is your ace in the hole for easy but impressive last minute desserts. I’d even argue that this big batch fruit crisp topping is the best crisp topping I’ve ever tasted. The fact that you make it ahead of time and stash it in the freezer so that you can whip up an apple crisp recipe or any other fruit crisp on a whim is a bonus.

Desserts are the big to-do. The thing over which you slave for hours or -in some cases- even days and present with a flourish to ooooohs and aaaahs. I’m as guilty of that as the next food-obsessed gal, from time to time.
But really? Desserts are supposed to be a relaxing thing. Grab a spoon or a fork, a plate or a bowl of the good stuff, plop down somewhere comfortable and give a good ahhhhhhhh. They’re supposed to feed your soul without taxing it first. In fact, ‘DESSERTS’ are ‘STRESSED’ spelled backwards. Tell me if this has ever happened to you.
I’m going through my day getting done what needs to be done. I make dinner and think to myself, “Oh, we don’t need dessert tonight. We have a big dinner and that’ll do the job.” Then after dinner, when it’s just me and my honey sitting on the couch, I think, “I wish I’d made dessert. I could go for something a little sweet right now.”
I have the solution.
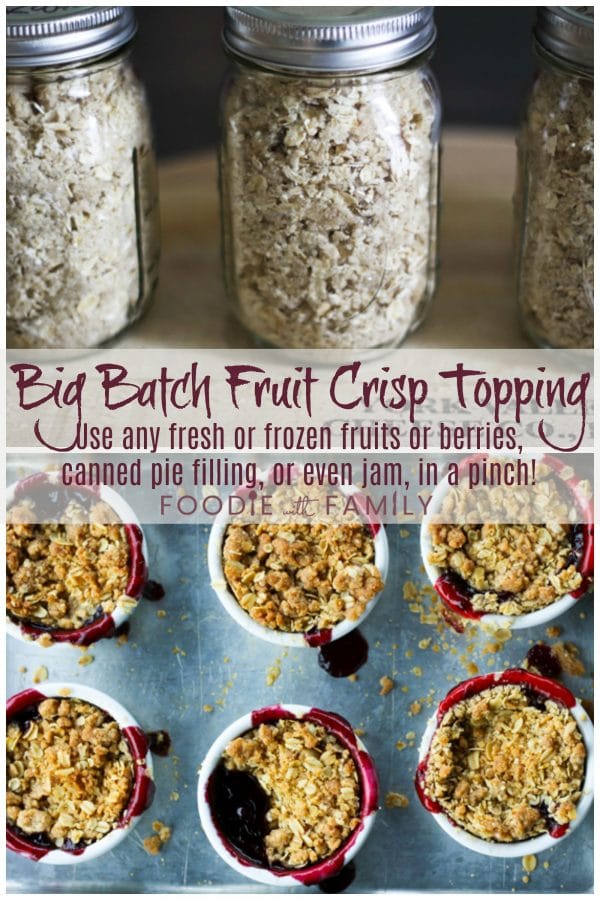
Make my big batch fruit crisp topping -essentially, this is sugar, oats, flour, some spices, and a lot of butter- drop it into canning jars or other airtight containers and pop it in the freezer.

Can I use Big Batch Fruit Crisp Topping to make Apple Crisp?
Oh my goodness, yes. You can make the ultimate apple crisp recipe with the big batch fruit crisp topping or you can use just about any fresh or frozen fruit. Your imagination is the limit! You can use homemade sweet black cherry pie filling, grape pie filling, apple pie filling, or even Cherry Habanero Lime Jam, Ginger Peach Preserves, Strawberry Jam, or Blueberry Jam to make your crisps, too!
How to Make The Best Fruit Crisp Recipe
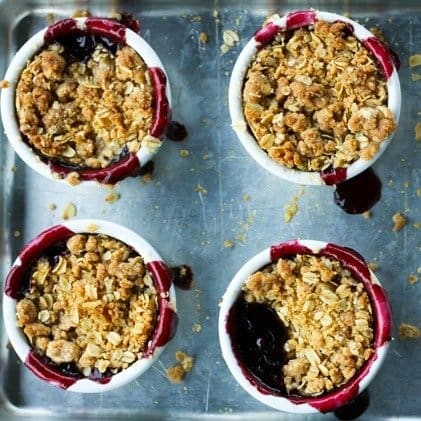
When you hit the dessert-regret stage of the evening, fill a little ramekin or two filled with fresh fruit or canned pie filling. In a pinch, you could even put jam in the ramekins.

Top with the ready-made big batch fruit crisp topping.

… and bake. Thirty minutes later you will no longer be stressed. You will have desserts.
How do I serve fruit crisp?
Here’s what happens next. At least at OUR house, it’s what happens next anyway. We get a container of vanilla ice cream out of the freezer and let it set on the counter for about eight minutes. We scoot a still-pretty-toasty ramekin into another bowl and top it with a pretty massive scoop of ice cream. We let the ice cream start melting just a wee bit and then we dive in.

Not bad for a dessert you threw together over a commercial break, eh? In fact, I’d call it darned good. So good, that it is the opposite of stressed. Literally.
Once you’ve tried Big Batch Fruit Crisp Topping, you’ll want to be sure to have it stashed in the freezer at all times!
How do I use Big Batch Fruit Crisp Topping?
- Simply add fresh fruit to ramekins or a pan, top with the big batch fruit crisp topping, and bake away!
- A jar of this crisp topping wrapped with a pretty ribbon and a recipe card giving instructions on how to use it and make more would be a beautiful hostess gift.
- Added to a basket with home-canned pie filling or some fresh pears or apples, it would make a thoughtful and delicious gift for any occasion!
Cook’s Notes for Big Batch Fruit Crisp Topping
- I do not advise packing your finished big batch fruit crisp topping tightly into the jars or bags. While it is tempting to save freezer room, it makes a hard-packed topping that’s far more difficult to crumble onto your fruit.
- The big batch fruit crisp topping recipe is one that doubles or triples easily. Just be sure to make no more than you can use within 3 months for optimal results.
Use these to make Big Batch Fruit Crisp Topping most easily
Big Batch Fruit Crisp Topping and How to Make a Fruit Crisp
Rate RecipeIngredients
- 1 cup light or dark brown sugar)
- 1 cup raw sugar or 1 cup white sugar
- 1 1/2 cups unsalted butter softened
- 1 1/2 teaspoons ground cinnamon
- 1/4 teaspoon freshly grated nutmeg
- 2 3/4 cups all-purpose or white whole wheat flour 11 3/4 ounces by weight
- 1 cup quick oats
- 1 cup old fashioned rolled oats
Instructions
- Combine the sugars, cinnamon and nutmeg with the softened butter and mix until well blended. Cut in the flour with a pastry cutter or two butterknives until the mixture resembles coarse crumbs. Stir in the oats until evenly and loosely combined and the mixture resembles coarse crumbs again.
- Fill jars or airtight containers with the crisp topping, top with a lid, label and freeze. This makes about 6 loosely packed or 4 firmly packed pint jars. (See note below.) This will yield about 32 individual crisps or 4 large (9″x13″) pans.
- Note: If you pack the crisp topping loosely in the jars, it will be easier to shake directly onto the tops of the crisps you are baking. This does, however, shorten the amount of time they will store well in the freezer to 3 months from 6 months. If you pack the topping tightly, you can keep it for up to 6 months, but you may have to chip it out of the jar with a butterknife. I prefer to pack it loosely knowing we will use it quickly. This helps me avoid the dreaded ‘stabbing metal things into frozen glass jars’ phenomenon.
To Bake Fruit Crisps With Make Ahead Crisp Topping:
- Preheat oven to 375°F. Lay out desired number of ramekins on a baking sheet (or lightly grease a 9-inch x 13-inch pan.) Fill the ramekins about 2/3 full of fresh berries, chopped stone fruits, peeled/cored/chopped apples, or pie filling. Sprinkle frozen crisp topping directly on the surface of the fruit, filling the rest of the ramekin.( If using a large pan, make sure the filling is covered with crisp topping by at least 1/4-inch.)
- Bake ramekins on the baking sheet for about 30 minutes, or large pans for about 45-50 minutes, or until the crisp is golden brown and the fruit is soft (or pie filling is bubbly.) Serve warm topped with ice cream, whipped cream or a little splash of heavy cream.
Nutrition
Nutritional information is an estimate and provided to you as a courtesy. You should calculate the nutritional information with the actual ingredients used in your recipe using your preferred nutrition calculator.
did you make this recipe?
Make sure to tag @foodiewithfam on Instagram and #hashtag it #foodiewithfamily so I can check it out!
This post was originally published in October of 2012. Updated with video and improved Cook’s Notes in August of 2018.

Nutritional information is an estimate and provided to you as a courtesy. You should calculate the nutritional information with the actual ingredients used in your recipe using your preferred nutrition calculator.
did you make this recipe?
Make sure to tag @foodiewithfam on Instagram and #hashtag it #foodiewithfamily so I can check it out!
Video
Nutritional information is an estimate and provided to you as a courtesy. You should calculate the nutritional information with the actual ingredients used in your recipe using your preferred nutrition calculator.
did you make this recipe?
Make sure to tag @foodiewithfam on Instagram and #hashtag it #foodiewithfamily so I can check it out!


Reader's Thoughts...
N says
I used to make my mix ahead in a mason jar and leave it on the counter, adding the butter at baking time. This freezing technique better for two reasons:
(1) It includes all the butter premixed without worrying about it going rancid; when I did it countertop-style the butter wasn’t added until showtime, which is kind of a pain, having to look up recipe & ratios again while people are waiting
(2) Storing it fully-ready in freezer bags now provides me with a delightful excuse to pull out my meat mallet and, using the flat side, smash something productively. Makes everyone think you’re doing heavy labor, but no one sees the wicked twinkle in my eye
I do suggest only half-filling the freezer bags and unzipping them before you smash to prevent explo… er, rupturing the bag
Rebecca says
HA! Thanks for the entertainment, N! I’m glad you love it and it is kind of fun to have crisp waiting for you at the blink of an eye… or should I say whack of the mallet?
Sasha @ Just Coffee Maker says
I made this for a Memorial Day potluck lunch. My sister-in-law, who has a serious Sweet Tooth and has enjoyed many of the desserts I have made over the years, told me this was her favorite dessert yet.
CL says
Wanting to verify these directions. In first step is says to mix listed ingredients (including butter) until well blended. Do you do this with a hand mixer? Then it says to cut in the flour. I’m questioning this because recipes often say to cut butter/shortening into a dry mixture. Thanks!
Rebecca says
Hi CL- You can certainly use a hand blender or stand mixer for the first part if you’d like to do so. You can also use a sturdy spoon and mixing bowl. It’s up to your preference. And while many times we cut fats into flours, this time we’re doing the reverse because we’ve already creamed the butter into the sugars. Thanks for asking!
Karen says
Because of this recipe (tweaked with Gluten Free Flours and Nuts) I’ve got a rhubarb crisp in the oven. Thank you.
Rebecca says
You’re so welcome. I kind of feel like a crisp for breakfast now. See what you’re done?
Naomi says
If you don’t mind my asking, just wondering why you include both quick and regular oats in the recipe? Thanks.
Rebecca says
I don’t mind at all. I kept the ratios and types of oats used by Maria in the original recipe because I liked the variety in texture and absorption provided by using two kinds of oats. It’s nothing more complicated than that! 🙂
Karen says
Yet again – a timely recipe as I had one more crisp worth of rhubarb left. I mixed gluten free flours (equal parts quinoa, fava and garbanzo and buckwheat) to come up with a substitute for the flour and GF oats and was very happy. After I put it in the freezer it dawned on my I should have used some almond flour too! Thankfully – there is always a next time! Dessert last night was rhubarb crisp and frozen vanilla yogurt.
Chris says
Great idea and time saving tip.
Mignon says
Great idea! Thanks so much!
Vivian says
Yes please…I have a pan of veg roasting right now and would love to know the RIGHT way to freeze! Also what to make with them later….I’m doing mine for soups.
Ellen says
That is a fantastic idea! Fruit crisps are my go to dessert already, and this will make them even easier!
Kathleen says
Oh my, that looks simply wonderful! I’ve really enjoyed your Make Ahead Mondays. Do you take requests? I’d really love how to make (and freeze) roasted fall veggies, do you have a recipe for that?
Julie @ Table for Two says
these look fabulous!! i love that they’re dripping all down the sides!
Ashley says
How have I never thought of this before?! So simple, but nothing short of genius!