
UPDATE (12/10) :Since first writing this post almost two years ago, I have been experimenting with different ways to cook beans. While I still use the crockpot method most often, I have changed on something. I use salt at the beginning of the cooking time. Really! It doesn’t slow down the cooking of the beans a bit and leaves them much more flavorful than if you add salt at the end of cooking. I stand (or rather, I sit, at this very moment) corrected. Salt away!
Beans. They are the perfect budget food. They’re chock full of dietary fiber and nutrients, simple to store and able to leap tall buildings with a single bound. And they’re cheap! They’re so cheap (“How cheap ARE they?” screamed the crowd. “So cheap they’re on the dollar menu!”) that there is no excuse to be without them. Even if you’re so poor you can’t afford to pay attention, beans are still in your ballpark. But -keeping it real here- unless you’ve grown up eating them or have been making them for years they can be a little intimidating to prepare and use. And various well-meaning and well-researched cookbooks have you jumping through a billion hoops just to make a simple pot of unadulterated beans. Not so beginner-friendly.
Why bother with dried beans and the extra work when you can buy canned beans super cheap? Dried beans last close to forever when kept in a cool, dry cabinet. They’re less expensive per pound and taste better than canned beans. And -perhaps most importantly- they’re better for you than canned beans. When you reconstitute dried beans you control the amount of sodium in them and ultimately in the finished recipe. When you start with canned beans you’re already starting at a super high sodium level (which can be a major health concern for many people.) There is more, but I think you get the idea. If you’ve never made dried beans before just do me a favor and try it at least once. I am pretty convinced I can convert you…
Here’s my plan. For the next few weeks, I’ll share a bean recipe with you on Thursday or Friday. That will give you all weekend to try out your beanerific recipes. This week, though, I’m going to start you out with a tutorial on how to get the dried little beasties to the point where you can use them in recipes… And I warn you: My method is so easy that you may not want to prepare them any other way. You’ll need a slow cooker, but if you don’t have one, you can snap up a basic model for $15 at le Walmart, le Target or le Blue-Light-Special. Don’t let anyone tell you you need bells and whistles on a slow cooker. All you really need are a “HIGH” and a “LOW” setting. Unless you’re cooking for one, get the largest of the basic slow cookers that you can afford. I always cook more beans than we can eat in one meal. You can portion them into individual servings and freeze them to add into soups and stews or make dips or refried beans with later. We loves the bean dip around here!
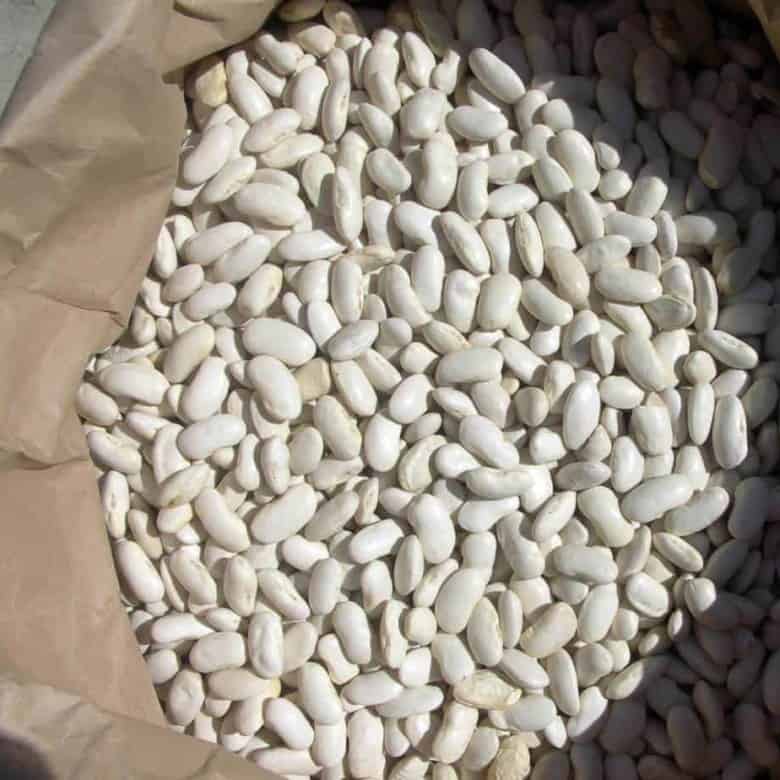
Because it’s what I’m going to be using in tomorrow’s bean recipe, we’ll start out with cannellini (white kidney beans) today, but feel free to kick it off your bean adventure with any dried variety that floats your boat; pinto, chili, black, lima, garbanzo… If you follow the method, you can make any kind of bean you want!
For a printer-friendly, photo-free version of this tutorial, click here!
Dried Beans: A Tutorial
Necessary equipment:
- a slow cooker
- a saucepan to boil water
Ingredients:
- 1 lb dried beans, (in this case, cannellini), or about 2 cups dried beans
- 2 bay leaves
- 2-3 frozen onion tops or 1 cooking onion, peeled and cut in half from root to end
- 2 quarts boiling water
- salt to taste
Pour your dried beans into a colander.

Pick through to find grossly misshapen, discolored or otherwise nasty looking beans or small stones.


Because dried beans are about the size and color of some pebbles, it’s not completely bizarro to find little rocks, clumps of dirt or other natural bits and pieces occasionally tucked into the bags. After you’ve picked through and removed any undesirables, give the beans a good hearty rinse under cold water, rubbing them around in the colander as they’re being cleaned. This ensures that you remove any dirt your eagle eyes may have missed. This also gives you a chance to look the beans over one more time.

Add the beans to the crock of the slow cooker. Place the bay leaves and onion tops (or onion) on the beans. Sprinkle about a teaspoon of salt, give or take according to taste, over the top.

Pour in the boiling water. (It really does need to be boiling. That is key!)


Quickly put the lid on the slow cooker, turn the cooker to “HIGH” and assess the situation. If your beans are covered by at least 2 inches of water you’re doing fine. If they’re covered by less than that, you’ll want to put some more water on the boil to add as soon as possible. Set your timer for 3 hours and go do a crossword puzzle or play a board game with the family.
When three hours are up, you’re going to do a test. Use a spoon to reach into the cooker and quickly extract a couple beans, replacing the lid immediately. Hold them a few inches from your face and blow on them gently. If the skins curl up off the beans, they’re most likely done. Carefully take a bite through the center of one of the beans. If it’s tender, you’re all set. When you cook black beans or pinto beans, it’s not unusual for them to be done that quickly, especially if they’re relatively new beans. If they are done, you can use them immediately, divide them into containers for the freezer or stick straight into the fridge -tightly covered- in their own liquid for use within four or five days.
If you’re cooking a larger (or harder) bean -such as cannellini, garbanzo, butter bean, etc…- you’ll likely find that the beans are not yet tender in the center. Turn the slow cooker to the “LOW” setting, add additional boiling water (if needed) to cover the beans, and allow to continue cooking for about four hours before checking again. Repeat the test; extracting a couple beans quickly and replacing the lid, blowing on the beans and biting them. If they’re tender, pull them from the heat and use immediately or store for later. If they’re still tough, give them a couple more hours -making sure they have water to cover- and repeat the test. Do this until they test done. The batch of cannellini beans I cooked in the photos for this tutorial simmered overnight on “LOW” before they were done.

In my own experience, garbanzo beans (the stuff of my hummus dreams) have taken the longest time to cook by far. Just be prepared to let them cook away. And, for pete’s sake, don’t sweat testing it if you have to let it cook overnight. Beans are pretty resilient as long as you’re cooking them in enough water. And if you overcook them there’s always bean dip!
If you choose to freeze the beans for later use, divide the beans into one or two cup servings between containers. Be sure to leave enough room to ladle cooking liquid over them so they don’t dry out and to account for expansion of the liquid as it freezes. Make sure the lid of the container fits tightly and stash in the freezer for later use. (Alternately, you can carefully scoop the beans and their liquid into zipper-top freezer bags taking care to seal them completely. The bonus of this method is they lay flat to freeze and thus take up less room.) Frozen beans will keep well for about two to three months in the deep chill. After that they begin to deteriorate a bit in texture and in taste. Not the end of the world, but after that point they’re only good for bean dip. (All roads lead to bean dip in this house.)


Reader's Thoughts...
jenny says
I have a question for anyone who might have a solid answer: I cooked some pinto beans a few days ago (4 days or so)…and put them in the fridge because I thought I would get to use them sooner than I turned out to be able to, for how long can dried beans that have been cooked sit in a container in their cooking liquid without causing any health problems?
cardassian says
Awesome, forgot to soak me beans overnight than found this. Hoping I can still have beans for dinner. You’re a star.
Ron Johnson says
I haven`t heard any one mention a pressure cooker after soaking over night.Cook for twenty five minutes,it works great
Dona says
When cooking cannelini beans from the dried state, why is it sometimes they pop or crack and the skins peels off?
Esther says
I really appreciate your site–especially the “from scratch” and “how to” recipes such as this one, cheese making, etc. Also the simplicity of so many of your recipes. I’ve used this bean method for the past couple of days and was very pleased. First I did garbanzos and they finished in just 3 hours. Then I did white navy beans–very old ones! They were also edible within 3 hours but I cooked them longer since I wanted them to be a bit softer. I’m wondering about the onion. Since you cut it in half rather than cutting it up, I’m thinking it is meant to be discarded after cooking. Am I correct? Does it absorb something from the beans–perhaps that’s why I’ve not had any unpleasant side effects such as Dennis speaks of above. Thank you for a very helpful and entertaining site.
C4bl3Fl4m3 says
Thanks so much for this! I’ve always wanted to start using dried beans as I’m a big consumer of canned black beans. I used an overnight soak and then boiled them with onion and garlic on my stovetop (I don’t have a slow cooker… well, *I* do, but it’s not at my boyfriend’s place) and used your blow and bite test, which worked perfectly. I even froze a bunch.
(Next I’m going to try your hummus recipe, as I also don’t have my food processor here and you’ve made my hummus dreams come true suggesting using a potato masher and making chunky hummus!)
Tina says
Such a well written, entertaining and info-rich blog. You are amazing. Keep up the great work and thank you for your passion and dedication.
Catherine says
Hey there…
So, you use the same liquid to cook and soak seeing as you don’t soak. Lots of cookbooks say that you have to get rid of the soaking liquid. But every time I try to make dried beans, they end up tasteless compared to the canned variety (especially black and garbanzo beans). Do you think I could cook with the soak liquid (other than kidneys of course)? Or maybe I should just invest in a slow cooker…I like that I don’t have to worry so much about burning my pots and pans while the beans cook forever.
stacey says
I’d like to know if you have to cook the beans before you eat them; I’m soaking some black beans to add to a mexican casserole and I’m not sure if I would still need them (or any kind of dried bean) to boil for any length of time prior to eating them. (they would be baking in the casserole dish for up to 1 hour.
Rebecca says
You would still want to cook them a bit, Stacey! I’d go until they’re mostly tender.
Spandangly says
I’m a little late to this party but I just found your site and am making my way backwards. Anywho, I also turned to dried garbanzos to support my hummus habit. I dump the beans in the night before with water to soak (I know you’re anti, but bear with me) and use that as my rinse as well. Dump any water left in the AM, load it up with water again and cook on low or high for just a few hours, no need to have the water boiling when you start. Seems to me from your description it lowers my cooking time significantly, no messing with additional pot on to boil, and with no extra effort; just have to plan on putting them in the crock the night before.
Also, I it should be mentioned (cause I had no idea) that red kidney beans should NOT be cooked in the crock pot. They MUST be boiled (temps a crock pot will not reach), or they can kill you. Go with canned kidneys! Any internet search will confirm.
Hooray for beans and crock pots!
Caroline says
Really nice tutorial on dried beans! However, I have to mention that the part about not salting them until the end of cooking to avoid toughness is a myth. I had always believed this myself, but I recently read in a cooking magazine that it wasn’t true. So, I pre-salted my beans and tried cooking them, and sure enough, they turned out fine. In fact, they tasted better this way 🙂
Rebecca says
Hey Caroline! Thanks for leaving that comment. I read something along the same lines a couple years ago and tried cooking the beans with salt. Mine ended up awful. I switched back to cooking without salt and have been happy with my results. If it ain’t broke, right? I’m glad it works for you, though. I wonder if it has something to do with the way I cook my beans since I don’t pre-soak them as a rule. Hmmm… That’s a question for Alton Brown of Shirley O. Corriher, eh?
Lynn says
You can add about 1 or two teaspoons of baking soda to the beans before adding them to your recipe (after they cook)and it will remove some of the gas. This is an old trick my grandmother taught me
Dennis says
I’ve always known beans were good for your health but my only problem is that I have a … a … shall I say reaction to them. Sometimes very severe. Is there something in canned beans that has this horrid effect or is this natural to some people and if so will somebody please point me to a Beano website that sells by the case!
Rebecca says
Scott- I get mine through my local chapter of United Food Buying Clubs. You can check out their website http://www.unfi.com to find the chapter closest to you. Also, I sometimes get them at a Mennonite bulk foods place around here. If you don’t have either of those options, you can check into mail order or a local health-foods place. Another great resource is disaster preparedness catalogues/sites like http://www.beprepared.com
Which beans are most practical depends on your personal preferences. Chez nous, the most practical and most widely used beans to keep in bulk storage are black beans, pinto beans, small red beans and garbanzo beans (in that order).
…And you’re welcome 🙂
Scott Pullon says
Where can I buy beans in bulk? What kinds are the most practical?
Thanks
Rebecca says
Sarah- Me too! Thanks and can’t wait to see you back here…
Susan- Thank you! You’re making me blush. Once you get hooked on the dried beans it’s hard to go back.
Brenda- I’m glad you found us, too! I’m very tactile. Love the dried beans on my achin’ hands!
Brenda says
Fabulous! I’m just getting into using beans and I’m so glad I found your blog. *grins* Nice to know I’m not the only one that likes to run her fingers through the beans.
Susan says
I am so glad I found this web site through Foodgawker. My first experience in cooking dried beans was last month and loved them. They were Giant White Beans (Gigandes Beans). If you have trouble finding these then Giant White Lima will work. These beans are very filling, creamy and meaty. Yum! Looking forward to watching your blog and learning in weeks following.
Sarah says
Brilliant post! I love beans. 🙂 Looking forward to your recipe suggestions.